
We have been working on our backyard garden since the weather has allowed us to this year. In West Texas, that means that by February we were preparing the garden by tilling it up, breaking it into sections and of course the “Rock the Garden” project. The weekend before last we finally got the grape arbor up so that our grapes would have something else to climb on bedsides our house or fence. So with all that done, what is left to take care of? Just a few small things. 😉
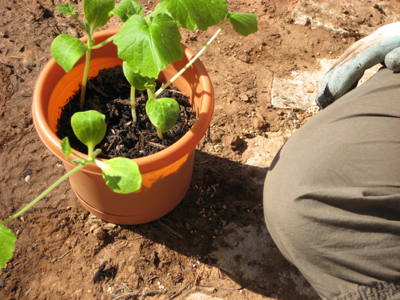
Our plants have been growing in pots anticipating the day they would get transplanted into the actual garden. Some have been growing for what seems like months, so they were finally big enough to make the transition. Before we took the leap we did have to hit our local Lowe’s store up and get supplies to help in the process. We wanted to get some organic insecticide and fertilizer and also we had been debating a misting system to help us water without much effort. So after grabbing those supplies, we were ready to get started.
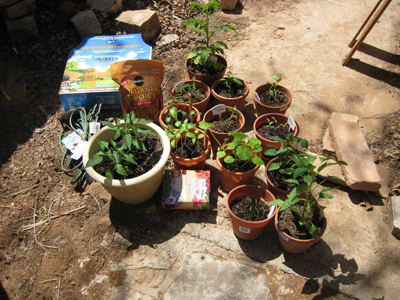
You will notice that we had quite a few plants, since a few of them had not been thinned out just yet. The tomatoes, squash, cucumbers & a few peppers had multiple plants in each – so we took the extras and repotted them for a friend of ours to use. No need in killing them for no reason right? So now Tim and his family can hopefully use them and not have to spend a few bucks per plant for no reason.
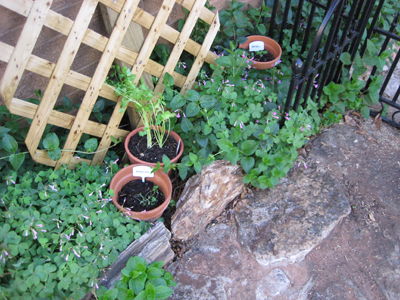
We did have a few plants that we decided to leave in pots and let grow off to the side in our flowerbed (that is inside the garden itself), we were afraid they wouldn’t make it in full sun. We plan on repotting them as well, in nicer pots – but in the meantime they are happy where they are. The three that stayed in their own pots were: Cilantro, Basil & Parsley.
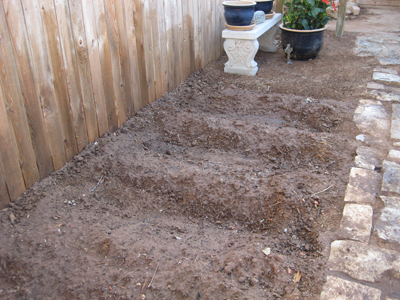
The first step to getting all this taken care of was a small bit of weeding we needed to do prior to planting everything. We tilled this up about a month or two ago and since then weeds have found their way to our garden, along with nut grass. Have we told everyone how we HATE NUT GRASS?!?! It has all but ruined our efforts of a front flowerbed and we have yet to find something that kills it.
How do you get rid of nut grass? I am glad you asked…
Well the reason nut grass is such an asshole is because if you just try and pull it, it breaks off and the “nut” stays underground. If you give it about a week, it is back. In order to get rid of nut grass, you have to get the “nut”. This all sounds dirty and all, but it is a real pain. I would say about 40% of the time when you are digging it up it breaks off and the nut is somewhere in the earth and you can’t find it. This means? Yup, your going to be doing this same thing in two weeks when it is big enough for you to hate it again.
Was that a rant? Sorry… the nut grass, yeah it sucks.
So we had to get that out of the garden (it had crept in on the sides a bit) and kill off a few tomato plants that had started to grow where we tilled up the old section where the tomatoes used to be. One cool thing we found (but like a dumbass didn’t take a picture of) was while digging up some nut grass we found an old tomato that had fallen off the vine and got covered up. Anyhow it had decomposed of course and the coolest thing was the fact that every single seed in the tomato had produced a sprout and so there was this ball of sprouts breaking through this decomposed tomato skin. Very neat to see, in fact we saw this a few times while digging. Wish we would have taken a picture to show everyone. DUMB!
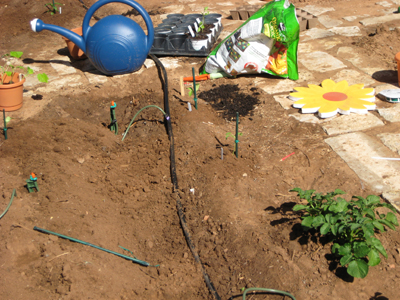
After getting the NUT GRASS out and the lil’ tomato sprouts, we were left with a clean slate to start our misting system layout. After reading the instructions and everything we saw it was really easy to do so we went into it head first. We layed it all out the way we wanted it and attached one of the mister heads to try it out. It had several connections and we pieced it together rather quickly and had it ready to try out before putting all the heads on.
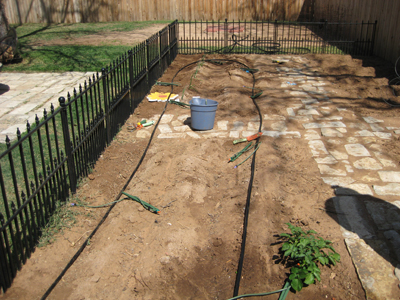
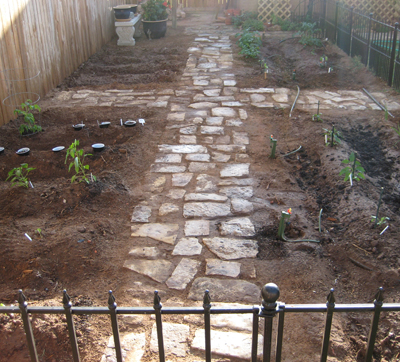
You can see above that we went ahead and laid out all our mister heads in order to get the best idea of where to put them for the best coverage. The first test went great and so we started installing all the heads and before long we had it all setup and ready to plant.
Prior to putting everything into the ground, Shala sprayed the bigger plants with an organic insecticide/fungicide solution that we bought at Lowe’s (Organocide). Simple enough, and hopefully effective. We didn’t want to use chemicals or high end fertilizers that would mean our veggies were not organic – so we found the best things we could to help out with disease and infestation. Not sure if this is the answer, but we will see.

Finally the time had come to get everything in the ground at last. We had a plan we had jotted down on paper (I didn’t get to scan it), however I will do my best to recreate it in Photoshop.
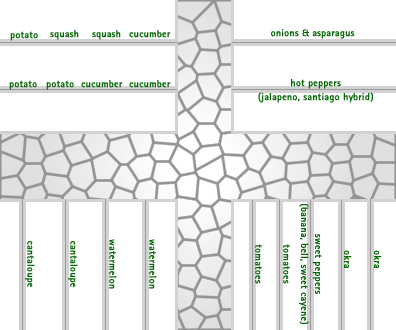
As you can see from the plan – we are nerds. However at least we are honest about it – some people are nerdy and just play it off. We are nerdy and love it. 😉 We wouldn’t have it any other way. Remember that the potatoes have been planted for some time now, the onions & asparagus have as well. When I say planted, I mean in the ground, not in pots. The watermelon & cantaloupe were something planned to plant via seed when we transplanted everything else – just easier that way.
With our plan in hand we started laying out the plants accordingly and while Shala started pulling plants out and ready-ing them to be planted, I was digging our holes and making the sticks to accompany the weaker/taller plants. We decided for the taller plants to plant them with small sticks to help hold them up for a while, until they get stronger. Mainly because here in West Texas we have about 3 days out of the week that are windy and the last thing we wanted to do was plant our plants and then come back to find them layed over and hating life.
You can see in the picture above that we had a handful of old pots from our last venture to the nursery, so we used them to separate the plants we wanted to give to our friends. It is always handy to have some extra “throw away” containers for that reason. By the time we were done, we had the entire thing filled up with plants to give away, and if we wouldn’t have had them – I am not sure what we would have done. Thank God, Shala is a hoarder. Or was that me?!
We divided and conquered the remaining plants once the holes were all made. I moved onto the next quadrant so that I could get the peppers planted, while Shala did the squash & cucumbers. I had the easy job, since most of the peppers were big plants and strong compared to the rest. They went in the ground easily and quickly and before we knew it the first side was completely done.
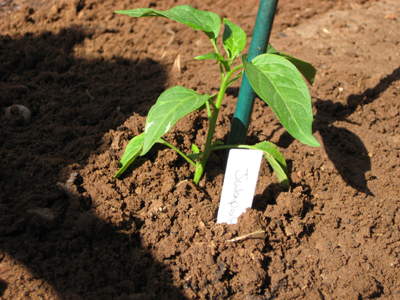
The next side is the drier of the two sides and so it takes a little more work to get things to go, so we opted for tomatoes & okra and a few sweet peppers on that side, then of course the watermelons & cantaloupes in the next quadrant. This side is very well drained; naturally it slopes away from the fence (backing this side). These went in quickly as well, the tomatoes (well the small ones, we did buy a big plant – so we could stagger them) needed cups to go around protecting them a bit from the elements (they are tiny guys!). Shala made those while I farted around playing with rocks and counting rolly pollies or something, like I said – I get the easy jobs.
After we got everything planted on that quadrant we moved onto putting the seeds for the watermelon & cantaloupe in the ground so they could start their journey into this world. We went with Black Diamond watermelons, and anyone from around here knows that is a killer watermelon to have around. They get around 30-40lbs and taste great. The cantaloupes are just normal, perhaps Pecos… can’t remember really. Those were put in the ground without much effort at all.
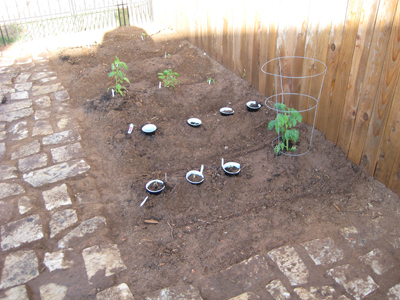
That put everything in the ground and we hit it with the water, of course the mister irrigation system is only set up on one side at the moment – however we are going to buy another kit and do the other side soon. For now though, we will hand water that side, and let the mister do all the hard work on the other. After we finished this is what it looked like.
It wasn’t easy, it wasn’t painless – in fact we both talked about how sore we were the next day (and in regards to the other stuff we did, like rocking the garden & putting the arbor up… sore as HELL). However, it turned out awesome and we were really happy with it. We are worried about a few of the transplants. Some plants just do not do well when you transplant them – like Squash & Cucumbers… so we are watching them close. The okra is looking good so far, and we were worried about them as well. I feel if we lose a couple, so be it… we will replant a few and have a staggered crop.
For the most part though, the garden is doing well, however we are exactly 2 days into it… so anything can happen. Let’s hope that anything (if it is bad), doesn’t happen.
we have something similiar to nut grass here, but it’s these little onions that grow in weird little clumps.
Looks great!!
@ghost – does it make you want to stab yourself in your face like Nut Grass does?
@Anna – thanks, we like it 🙂
Nicely done, I’m impressed. Nut grass, huh? That’s one of the few weeds I don’t have an infestation of.
Ghost – yes! The wild onions! They are everywhere! I’ve resorted to digging out the top 10″ of soil everywhere in my yard and I’m gaining on them. Grueling work over the course of several years, and expensive to have hauled away. Whatever you do, don’t let them spread!
dubz: yes. that is exactly what they make me wanna do.
megan: we caught them early and have just made it a habit of getting them out as soon as we see them. our neighbors though…well, let’s just say they have been over run and are now firmly under the thumb of an oppressive dictator.
that one pic looks like you buried a few bodies.
@ ghost – T’was a pear tree that produced bad fruit. Law of the land.