
 So yeah… I had no clue what to call this thing when I made the “blueprint” this morning. Then I ask Shala what is that thing called… she says, “A planting station.” Made sense.
If you want to know how to make an awesome DIY gardening planting station – we have the walk-thru for you. At no charge. FREE! We did all the planning, and all you have to do is follow instructions. You can do that right? Sure.
So lets get started.
First, let’s go ahead and answer the few questions that are likely running through your head at the moment:
How much time does it take to make your own planting station?
Time is important, you can easily screw up a project by not allotting for enough time – then scrambling at the end to get it done. Mistakes will be made. So I would honestly allot for 2-3 hours on this one. Considering you have a couple people (yourself and someone to help). Since you are going to know exactly how to do it all – it should be easier and quicker, ours was done and that was even with a bit of ad-libbing
How much money are we talking about here, for this planting station?
We realize that we are in a recession at the moment… so this shouldn’t break your bank. We went for a lil better materials, but still kept it right at 100$. If you went with just regular (untreated) wood – it would be closer to 60-80 I’m sure of it. If you have any of the materials already… then even cheaper.
Do I have to be a master carpenter to build this planting station?
Nah. Do you know how to measure a board? Use a power saw? Drill? Then you should be fine. If you can’t run one of them… try the non-power versions. The main component is not the tools, but the ability to follow directions. Can you do that? A monkey can screw a nail in, but it takes a lil brain to follow directions sometimes.
I think that about covers the obvious questions, let’s move on to the tools & supplies you will need to acquire:
Tools:
Radial/Miter Saw (you know, a chop saw) or some for of saw
Drill
Screwdriver Bit
1/8 inch Drill Bit
Small T-Square
Pencil
Supplies:
(1 lb) 3 inch wood screws
(1 lb) 2 inch wood screws
Wood Glue
Wood:
3 – 4x4x8
2 – 2x6x10
1 – 2x4x8
2 – 1x6x8
2 – 48″x24″ (quarter sheets) plywood
Did you get it? Do you have any of that already? If so, just means the less time you will have to spend at Lowe’s & a few extra dollars you can save. A few things I want to make clear. You probably saw the 2-48″x24″ and thought to yourself. They sell them in 4×8 sheets, do I just buy 1 sheet? Nah. If you look around, you will find half & quarter sheets. You can either buy one half sheet or two quarters, whatever makes more sense. I personally do not trust my skill to cut a straight line (and I don’t own a table saw). So if a machine has cut it for me, and I have to pay 1 more dollar… big damn deal. I will get it in the way that makes it easiest. So whichever you want to do – go for it. Other than that, everything else is pretty straight forward.
Ok… so let’s look at what we are going to be building.
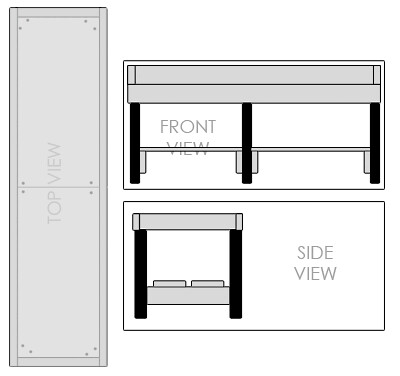
Make sense? Hardly. I know your thinking… How the hell am I supposed to know if I want to build one based on that drawing. True, true. Here here are a few pics of the end result (in real life, not animated).
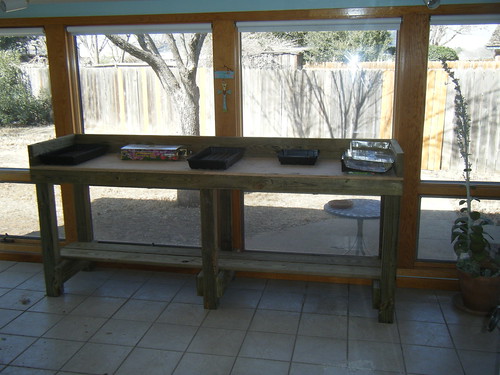
How you diggin’ it? Pretty cool huh? So if you’re still interested – let’s move on to the cutting that needs to be done.
The Cuts You Will Need To Make
I had to really think this out as I went, the shelf on the bottom wasn’t really on the plans to begin with – so I had just bought stuff to add it. I figured it needed some bracing as well to hold the legs all together. Now that it is finished – it was a no-brainer. This is one SOLID piece of work. I say that because I went back and forth to the saw near the end. However, you should be able to make all your cuts at the same time and save a lot of “back & forth”.
See – that’s why we do this… to save your ass from the planning & figuring out parts. 😉
Here is a list of the pieces you will need:
2 – 24″x48″ plywood (1/2 inch) ** this is the countertop
6 – 4″x4″x36″ ** these are the legs
1 – 2″x6″x8′ ** this is the back-splash
2 – 2″x6″x22 1/4 ** these are the side-splashes
4 – 2″x6″x22 1/2 ** these are the bottom shelf supports/braces
1 – 2″x4″x8′ **this is your front overhang
2 – 1″x6″x8′ **these form the bottom shelf
Simple as that. I will tell you how I did it, and you can look around for better solutions and then leave comments on how smart you were to buy a 12 ft 4″x4″ post and made a million legs out of it. Enough for the whole world. And you saved 6 dollars. Cool. Good job. I’m proud of you. How did you get here again? Searching for a “how to make a gardening work bench”. Oh yeah, that is right. So if you were so smart… you probably wouldn’t be knocking on my door asking for some sugar huh. There. Take that.
Sorry, bit of a rant there. You internets are cruel sometimes.
So we went with an 8 foot work bench. If you want to change that too – go for it… just know your going to be doing a lot more cutting. I for one, feel the least you have to cut – the better. But if you want a certain size, go for it. I am going to base this how-to on an 8 ft. work bench.
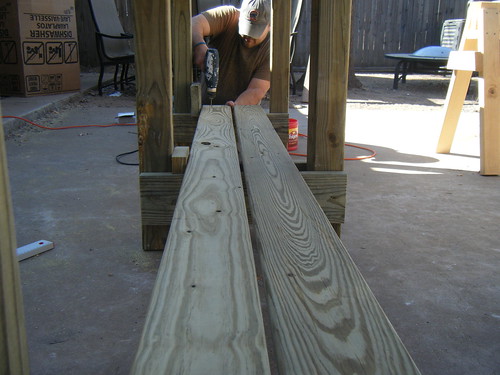
You should have picked up 2 of the plywood pieces that are already cut to what you need, so nothing to do there. If you went the “cheap route” get to cutting your two exact pieces. Good luck with that. Also, if you purchased a 8 ft. 2×4. you might just want to lay your plywood down like it would be your counter top and butt the two edges together. Then lay your 2×4 & 1 of your 2×6(s) and mark them perfect. You should have to trim your 2×4 about a 1/4 inch. No problem. Then cut your 2×6 to the length of the counter top too. Should be 8 ft. (I only say to do it this way, because some machine might be off a tad and you end up with an extra 1/4 inch or something and you ends aren’t flush.)
Once you have cut those, let’s go ahead and get our other cuts done.
The excess piece you had of your 2×6, go ahead and cut it into one of your side splash pieces and then save your extra pieces because you will use them as a helper later on when we start putting it together this thing.
With your remaining 2×6, go ahead and start cutting the rest of those pieces – 1 side splash, 4 shelf supports. You will be able to get all of them out of the piece you have left.
With those cut, move on to your legs, and you want to be sure you get this perfect. Last thing you want is one of those shifty tables like at the cafe. You know the ones, you put sugar packets under it trying to make it even. That is the last thing you want.
Once you get those cut, you should be ready to get going on the putting together part of this project.
Let’s Put This Thing Together Already
I found the easiest way to do this was to do the counter portion first. This thing gets heavy fast, so honestly I would build it at least in the room you plan to put it. It isn’t messy or anything (other than a lil bit of shavings from drilling the holes), so don’t worry about it. It won’t be any worse than a little vacuuming.
So first lets get all our counter pieces together, so grab your backsplash (2″x6″x8′), your two side splash pieces (2″x6″x22 1/4″) the two equal pieces of plywood (24″x48″) and the front overhang piece (2″x4″x8′). Also, grab your wood glue, drill (also your bits – both the 1/8″ & the screwdriver bit) and finally the 3″ wood screws. While you are at it, grab your scrap pieces of each size of wood (2″x6″ & 2″x4″) – we will put those to use as our “helpers”.
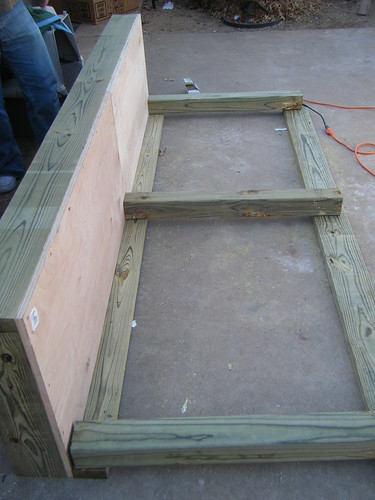
Go ahead and set your backsplash down first, as well as your two side splashes. It should make a bit C shape, a boxy C shape. Then you should be able to set your two plywood pieces on top and get everything flush. Once you have it flush, we will begin drilling our holes.
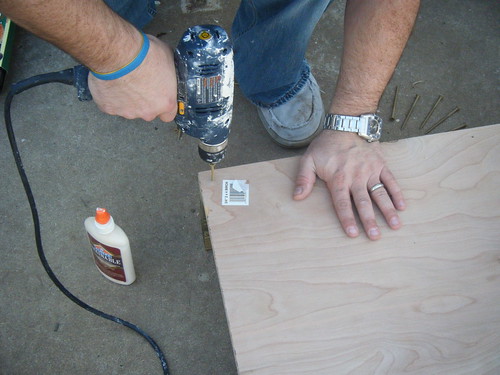
I would distance them around 6-8 inches apart, all the way down your backsplash – holding it tight so you don’t screw up your alignment. Once you have your holes drilled, you can go back and put glue and re-align.
Line it back up, then start in with yours screws. The easiest way I have found is to do each of the ends of each board first – that way they are on there solidly and then put in the other screws. Once you have the backsplash secure, you can put your side splashes on, same method… drill, glue then screw. Pervert.
After that, you have your counter top assembled, now you just need to put your front overhang on, then legs – shelf and done. Simple eh?
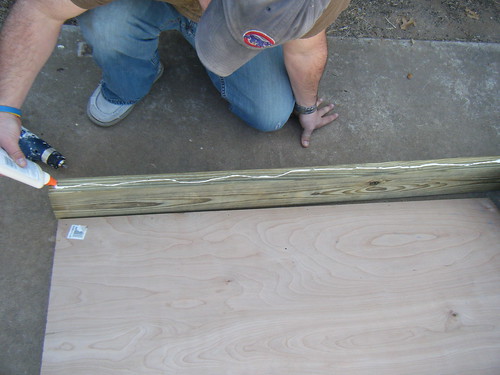
So this one is a lil tricky, but not if you think about it first You are going to want to put the overhang on but you ‘re going to drill through your plywood – into your 2″x4″ overhang. Grab you a couple scrap 2″x4″ so you can use them as helpers. They will keep the other side of the counter level with the overhang. Hard to explain – but here is a pic:
Same thing with this board, you need to drill holes about 6-8 inches apart. Glue, then screw.
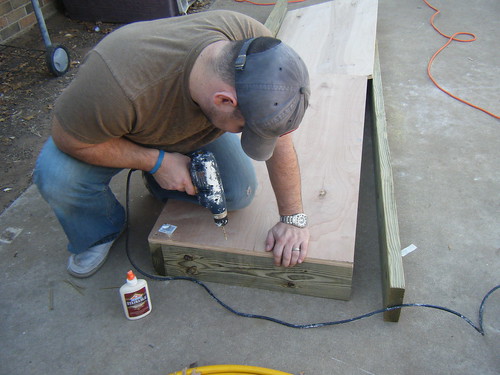
Now you have a full blown counter-top w/ front over-hang. Very cool, however – still unfinished. Next we will put our legs on to get this thing up and off the floor. Go ahead and grab your 6 (4″x4″x36″) legs… you are going to need them. And go ahead and grab those helpers again – you can use them to brace your legs while you drill/screw them. Lay your counter where the front over-hang is flat on the ground and your backsplash is facing the sky. Now set your 3 legs for the front, with your scraps underneath the part of the legs farthest away from the counter. I used a 2×6 I had in the picture below – but you get the idea.
This is where you will need a helper. You want these legs on tight and straight – so get your helper to keep constant pressure on the legs (from the bottom) while you drill/screw each into place. I placed just one screw & glue on each leg, however later you can put one in the front (through your front over-hang) to sure it up. Make sure to get all three in straight and tight, you will finally flip this thing in its correct upright position.
Once again, you want your helper present to help you get it up and while one person holds it – the other goes and sets each leg in its place (the other 3 legs). Once everything is stable, then one person holds a leg, while the other drills down from the countertop into the leg. Keep it straight, and make sure it is tight.
With all 6 legs in place, all you have to do now is put your braces on each set of legs and place your shelf. You’re kicking ass. Seriously. Keep it up, it will be so worth it.
The braces are easy. Get your 4 pieces (2″x6″x22 1/2″) you cut for braces and also your two (1″x6″x8′). Pick up a piece of scrap that once again will be used as a helper.
What you want to do here, is take your two long boards (the only long boards you have left) – and lay them down between the legs the entire length of the planting station. Stack both of them up on top of each other right in the center. Now this will give you a base you can brace your leg braces on while you line them up.
Start on the end and do each end, then the middle – fastening each set of legs together. I used the two boards stacked up, plus I would put one of my braces width ways (2″) underneath my brace to keep all of them the same as I went to each set of legs. Check the pic, you can change this according to how high you want your shelf – but this is where we wanted ours.
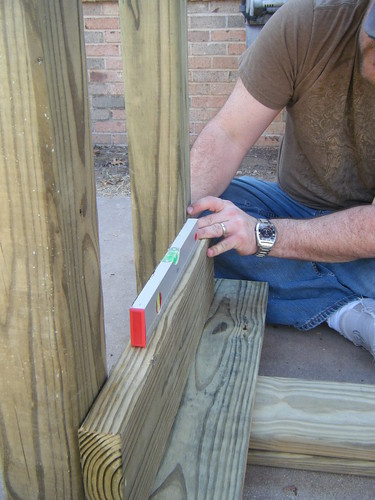
You can see under my brace I have one 2″x6″ laid on its side on top of the two shelf pieces stacked on top… so probably close to 4 inches off the ground is my brace bottom. I level it; put two screws in each side – then move on to the next set.
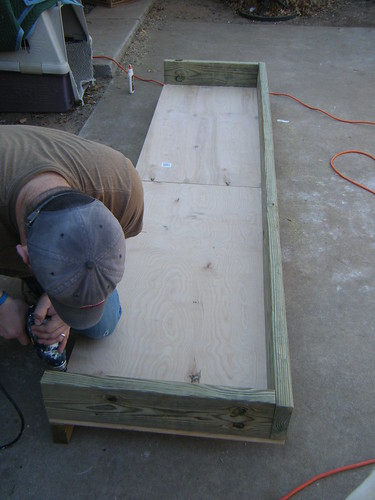
After you get each leg set done – it should look like this as far as the legs go:
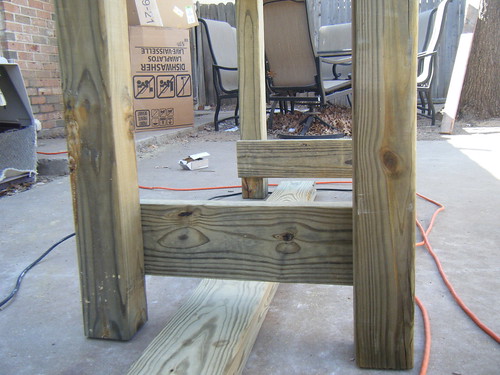
That picture actually just shows two legs completed – you do the same to the other side and then place your long boards (1″x6″x8′) on top of your new braces and you have a shelf that runs the length of your counter across the bottom. I suggest putting screws (maybe not 3″) through each board into your braces. I once again used some scraps to space my shelves out so that they were perfect… I’m OCD like that. So. Deal with it.
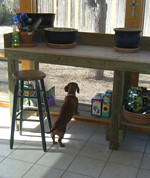
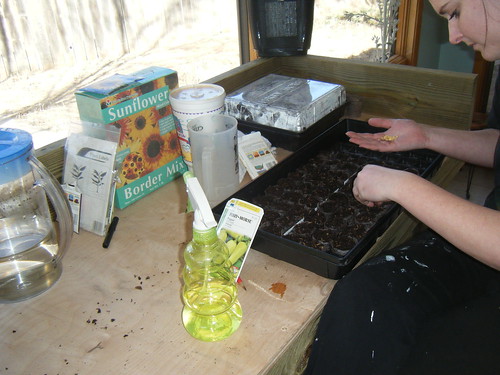
After the bottom shelf is put on, get ready… because you are ready to get drunk and plant random things on your BRAND… NEW… PLANTING STATION!!! Check it out…
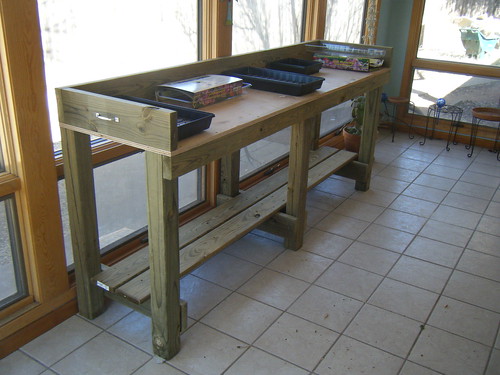
That was from the front, this is from the side…
Sweet. Now you can put handles on it if you want. We have tile, so we put those sliders on the bottom and some handles – up to you. This thing weighs like 9 million pounds so – so we tried to figure out the best way to make it “portable”. At least as “portable” as possible. Totally optional though, works just as well without the handles.
Just something you can do with your scrap wood – here is a lil top counter shelf so we could setup our laptop up top. I just cut out of scraps…
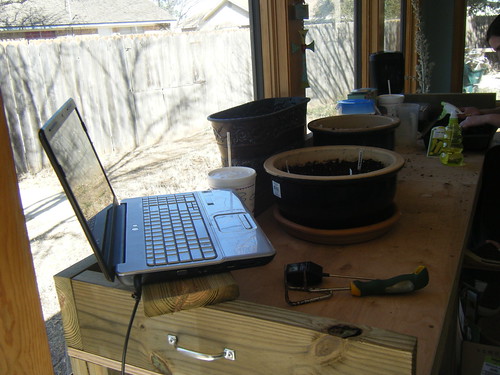
Also – we ran a power strip to the bench and hid the wires. We fastened it on the back of the backsplash and so we have a power source pretty much built into the planting station. We can plug-in the laptop, a heater and a heating pad if we need to – no problems. definitely something to think about.
But that is it. For around 80 bucks, you can have your very own custom (besides ours… and everyone else that build this) planting station/work bench area. In 3 hours, you can turn some wood & screws into a fully functional work area for your gardening. It didn’t take long for us to put it to work – I’m sure you will find a use for it too!
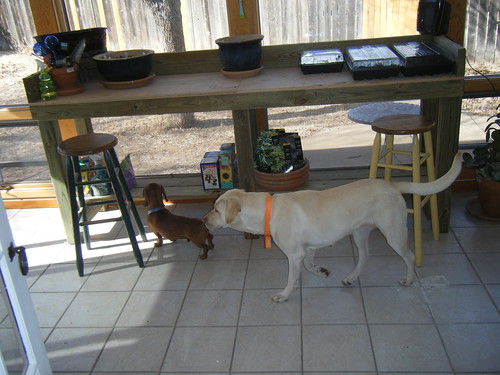
And the dogs like it too…
If you have enjoyed this how-to, please share it with your friends, neighbors, cousins, uncles, brothers, sisters, aunts, enemies – whomever might find this information useful. Digg it, Mixx it, Reddit it, Tweet it, RSS it, Share it… do whatever in the heck it is that you do to spread it like wildfire throughout this thing we call the intra-web. Do it fast, do it now, do it yesterday, do it last week – do it tomorrow, next week or whenever you find this post… do it then. Just kidding. Do. It. Now.
HOLY CRAP!! All kidding aside (but just for now… no promises by the end of this comment), your bench is totally cool! So when were you coming to Seattle?? Like… to build one for us?? um… ’cause we’re gonna need that soon… so um… I’m gonna need you to plan a trip out here… and come in on Saturday to get that done… yeah… thanks…
Wow! That’s fantastic. Great job! More room for you to work and more room for your seedlings to grow. They’re lucky plants!
@Shibaguyz – haha… at least we have an excuse if we ever want to go to Seattle. Thanks.
@Heidi – It did turn out pretty cool, and we haven’t spoken to the plants directly (yet), but they appear to like it.
And to both of yall – it is super easy to do, and for the money – way worth it.
Nice. Plus it gives me an excuse to buy that saw I’ve been eying.
Pingback: Updates From The Double Danger Planting Station | Double Danger
Pingback: Friday Recycle - We are Recycling some old material | Double Danger