
We could have used you this weekend. Seriously. Whoever you are… if you have hands, feet – some amount of common sense (hell even Izzy can dig) and a brain bigger than the average pear… we could have used you. We are trying to get the garden ready to be full-fledged-top-notched-awesom-ness, so in order to do that – we had to till up the existing garden and enhance it per a master plan (produced on a piece of paper at the coffee table).
The only thing we had planted at this point is potatoes, and we had a few broccoli plants left from the fall/winter batch of goodies. So after plucking those badboys – the stage was set to till that thing up, mix in some plant friendly soil (organic of course) and lay some rock pathways to break up the massive size of the garden.
So first thing first, we spent some time cleaning up the rocks and freakin’ pecans that had accumulated over the years in the soil and pulled leaves that had buried themselves amongst the cracks and voids of the pile of rocks located just to the south side of our house. We would use that as mulch & compost (since some of it has been there a while) and distribute it throughout the garden to till in when the time came.
After doing that, and cleaning out a few flowerbeds (which gave us more leaves and compost) and distributing that around the garden soil as well – we were ready to till. Wait… I was ready to till. I drew the short straw on this one. Actually I wouldn’t put Shala through running that old tiller. She would be thrown up on the roof – which would be a whole other problem… however she could fix that attic fan that sounds like a Harley just pulled into our bathroom.
That’s a different story though. Moving on.
So I tilled up the entire garden (minus the potato patch), mixing in soil & leaves, mulch and what have you – being sure to be as thorough as possible in the process. Reason being is that we were then going to dig up the spots for the pathway. So if we half-assed it, it would just mean more shovel work later. Not fun.
Mashala was busy snapping pics while I was running the TILLER OF DEATH. Smoke once again flowing out of the thing like a Cheech & Chong car. My brain screaming – “THIS ISN’T POSITIVE!” My arms screaming – “I HATE YOU FAT BOY!” Proof that I really did work – and proof you were not there helping out… shown below.
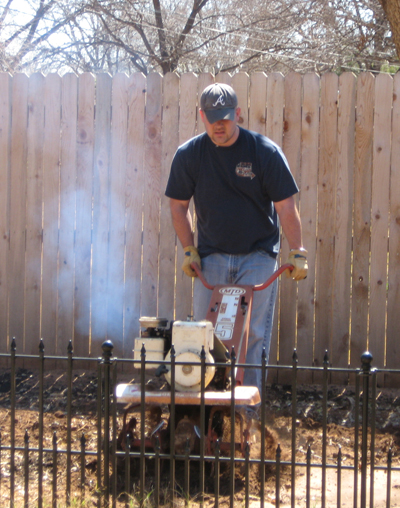
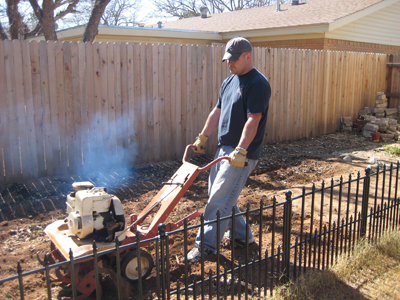
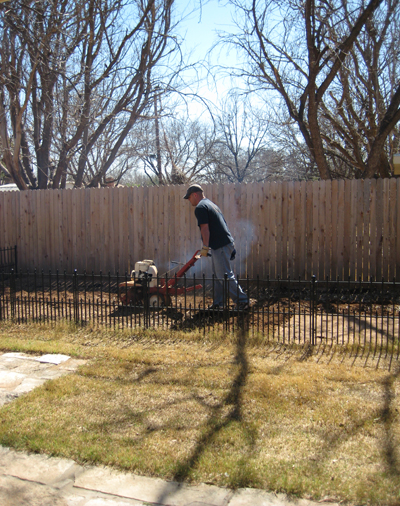
After the tilling adventure in the garden, we spent time going through again – pulling rogue grass roots and other nonsense that got churned up with the tiller. This took about 10-15 minutes, but the pain and brain cell damage from the smoke will surely last a lifetime. After finishing up, I smelled like I had been driving around in a ’69 Firebird – eating exhaust the whole time. Except I wasn’t doing anything that cool; just running the TILLER OF DEATH.
Soon after that, well after I slammed a few beers in favor of killing more brain cells and regrouping a bit from the fumes… we went ahead and ran the stakes to rope off our pathways – so digging would be a bit more accurate than just saying…
“Yup… looks good!”
Doing this would hopefully keep us from having a half retarded walkway that would lead you in a slightly circular motion – eventually leading you to believe that the exhaust must have really been as bad as I blogged about. At least that was our hope. There was still the matter of laying the rocks and staying between the lines. A problem I have had since grade school (or slightly prior).
If you can tell by the picture – we divided the garden into 4 quarters (you know, like a football game – without the halftime show). So the stone will make a cross (like our last name – are you getting tired of the parenthesis yet?) path – too keep our feet off our taters & other veggies. Pretty smart eh? Not really.
So after that, which we will now call the EASY PART… we were left with digging down a bit, so our stone could set as flush as possible with the top soil. Now here is where I will get flack for not using concrete and not setting forms to hold everything in… but you know what – I’m grown and I can do whatever I want! When you pay the mortgage at our house (don’t even say anything WIFE), then you can tell me how to lay my rock. Or if you want to come over and work side by side with the coolest gardeners you have ever known… then we will talk. Until then, shut it. Eat your crackers and read my blog.
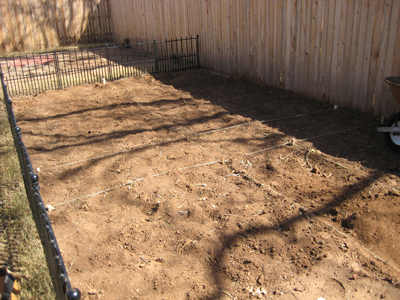
I do have plans to use sand as a cementy good time over the rocks, but for now we are setting them on stamped ground – as level as possible with as many low places to gather water and piss us off. No – really we are not trying to make low spots, but we seem to be pretty good at that, so once again we will run with it. 😉 This crap is hard work. We started and quickly had to retreat and take a break to regroup. My goal was to get the long center row done, then finish up the two small sides of the cross the following weekend. Quickly I realized that I am fat, and I set expectations way to high for myself. So instead, we settled for finishing the first leg of the cross. We took pictures prior to finishing, but I will snap one of the finished portion later today – so you will know we are not liars. Below you can see a bit more than half of the first section.
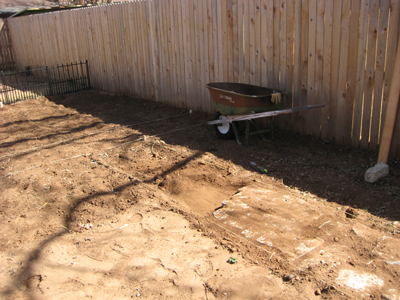
Oh and by the way, do you see the killer wheel barrel in the background of that pic? Let me jump off the story for a sec and fill you in on that bad boy. We were driving to Home Depot (imagine that!) and on the way we saw the before-mentioned wheel barrel sitting in a driveway with a For Sale sign on it. Being the frugalists we are, we had not purchased a wheel barrel yet, since they are like 80 bucks and this kid isn’t about to pay that for something you use about once a year. So seeing this beacon shining on our drive to Home Depot, had us bustin’ a U-ey in no time and inquiring about the rugged looking villain in the driveway. The old man told me he had just bought it at a garage sale the day before for his son and when he went to deliver it, his son had just bought a new one. He had no use for it and was just selling it for his cost. 15$ was the cost. Smacked his hand with the money and took off with the relic in the back of the explorer.
We were happy with it, I like the old ones, they remind me of my Grandpa for some reason.
Anyhow, after finishing it all up for the day – we realized it will be a couple-weekend project. I hope the weather holds up this weekend so we can at least get out there and finish another section. We have to get it done, so we can get our rows done and other veggies planted that need to be. We will post the pics when we get it done… and don’t forget – there is always work to do over at our house if you feel the need to show up. 😉
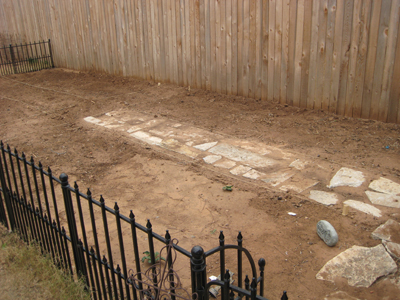
Update: So took the pic of the pathway in the garden to give everyone an idea of what it looks like and also so you couldn’t call us liars for saying we got to the middle point. SEE!
That really looks nice…good work. When you get thru with that, come on over to our house. We are trimming trees and then going down to grandpa’s to do his…we could use all the help we can get.
Pingback: Gardening Gone Wild » Blog Archive » GBDW - Stone in the Garden Wrap-Up